Showing posts with label acrylic. Show all posts

Wednesday, January 30, 2013

Mixed Media

I've been considering trying to do something with oil pastels for a little while, and my friend Aleda O'Connor, who has worked with them for some time, was very encouraging. Much as I love Aleda's approach (and I urge you to check out her blog) I wanted to do something different with them.

Recently, with my acrylic landscapes, the surface texture of the painting has become more and more important to me, to the point where I now regularly texture my panels with various rough grounds and use thick paint where I can. I was hoping that using oil pastels over top of such an acrylic underpainting would yield some interesting results.

So, during a recent landscape class, I coated an acrylic underpainting with clear gesso and took the oil pastels to it. I was very pleased with the results.


I have also been looking for an approach to figure painting that would allow me a more expressive, gritty feel. I took an abandoned demo of a landscape underpainting and coated it with a pastel ground. I made a very rough, blocky carbon pencil drawing of a figure and overpainted thin acrylic washes to emphasize warm and cool areas, then went to town with the oil pastels. Again, I am very pleased with this little experiment, I think it shows a lot of promise.


Next, I'm going to try some still life or floral compositions, and see how those suit me. I may be on to my next obsession...

Wednesday, November 7, 2012

Acrylic Step-by-step

I originally painted this several months ago for a school group presentation at Visual Arts Mississauga, an introduction to creating a painting from the ground up, as it were. I've since been asked to add some explanatory text to the step-by-step photos and post it for others, so here goes.

There are some general guidelines worth keeping in mind, not just for landscape, but for most painting:

Paint from the big shapes to the smaller details - don't get trapped in each and every detail at the first stage. Use large brushes at first, switching to smaller as you need to add detail or refinement. (You may find, as you go along, that there are lots of details that can be left out.) You don't have to paint every leaf and flower petal - leave the greatest detail for your focal area.

Paint from thin to thick, transparent to opaque. Shadows are usually most effective if they are somewhat transparent. Avoid adding white to your shadow colours until you need to modify the colour and/or the light later on in the painting process.

Lay down your brush stroke, and leave it alone. Don't mush your brush back and forth along the same stroke; that destroys all the character of the stroke. And do try to stroke, not jab, dab or stab.

Consider your composition first. It's important to go into the painting stage with a plan, so several thumbnail drawings of your subject are always a good idea. These are small, simplified drawings, with no concern for detail, but looking at balance, shapes, arrangements of lights and darks, etc. Interesting composition tends to avoid placing your centre of interest actually right in the centre of your painting! A good starting place is to divide your canvas into thirds, both horizontally and vertically. The points where the thirds meet are good focal areas.
The first thing I like to do with my canvas is give it a thin wash of colour all over, very roughly. This is called the imprimatura, and it gives you a mid-tone to work on, which makes it easier to judge your darks and lights. I usually do my initial drawing directly with a brush and thinned paint. In the example you can see how scrubbed on and rough the imprimatura looks. I have only concentrated on the big general shapes, nothing fussy.

The next stage is blocking in the darks. I tend to to use cool dark colours, at least in the beginning - blues, purples and cool greens. They can always be overpainted later if they need to be lightened a little or warmed up. Then, consider where the lightest light(s) will be. Often, this will be the sky. Now you have a pretty good idea of the range between the darkest dark and lightest light. Everything else will relate to these. The roof of the tower will eventually be fairly dark, but I don't want to lose it in the dark of the tree at this stage, so I'm going to leave it alone for now.

Notice that the sky is not a solid blue. It's lighter towards the horizon (and maybe a tiny bit yellowish) and the large areas of blue are broken up with some paler, almost white, shapes. I haven't tried to paint anything that looks like a puffy cloud, just the suggestion of clouds.

Now we get into the real landscape colour - green. It's very important to vary your greens. Look at how deep and rich the midground trees are, compared with how cool, bluish and paler the far background trees are. The hedges and lawns are much warmer, with more yellow and orange added. Some of the shadows have been modified to give them a little more colour and light. A point about brushwork - don't try to smooooth out all your strokes! An important part of the Impressionist approach is to have distinct brush strokes with varying colour side by side.


With a lot of the foliage taken care of it's time to look at the tower and bridge. Now I can look at the lights and darks of the architecture in relation to the surroundings. Even though the tower will be lighter than this in the shadows, I still want to be sure that I'm keeping the sides distinct from each other - light, mid-tone, and dark. I'm also starting to work in some of the colour on the paths and the far background buildings.


I can start to fill in the colour of the stonework now. I have no intention of trying to paint each individual stone and brick, but I want to leave a strong impression of the difference in texture between the tower and the trees. Individual strokes, laid down and left alone, are the key here. You can see that the shadow side of the tower is now considerably lighter than the previous step, but each side of the tower is still seperate. Can you see a hint of warm reflected light in the shadow side of the tower? I've also cleaned up the paths a little, with better definition of the lights and darks.


Some finishing touches and the sketch is complete. I've added more detail to the left side hedges, defined the distant tree trunks and added some sky reflection and accent darks to the canal.


Voila!

Thursday, April 26, 2012

Silent Auction

The Neilson Park Creative Centre recently held a silent auction fundraising exhibition, in which I participated. The Square Foot show required only that the pieces all be 12 x 12 inches. Medium, support, subject (or not) was all completely open. I believe there were over 100 entries altogether. I am pleased to report that my piece sold, and I'm glad I was able to support one of my community's arts organizations. This is Tomahawk #3, acrylic on panel. Tomahawk Island is in Georgian Bay, near Georgian Bay Islands National Park, and is privately (corporately?) owned by the Tomahawk Club, founded in 1895.


Wednesday, February 1, 2012

Back to Class

I statred teaching again last week and had a very pleasant surprise. Winter can often be a tough time to cajole students to get out, and I expected a minimal number of students for the term, but I came in to a class of 15! It's great to see a bunch of new faces, and a few previous students.

We're working on a class titled the Spirit of Seven. It's an attempt to follow in the steps of the Group of Seven and Tom Thomson, very influential Canadian painters from the early part of the 20th century. Much of their early work was done in Central Ontario, Algonquin Park and Georgian Bay, and further north, in the Algoma region north of Lake Superior. The focus was very much on the ruggedness of the Canadian Sheild landscape.

My demonstration is from Tomahawk Island, on Georgian Bay. This scene exemplifies the subject matter of a great deal of the early work of the Group, and especially Thomson - the rough granite of the Sheild, Eastern white pine, cold lake water and an often brilliant sky.

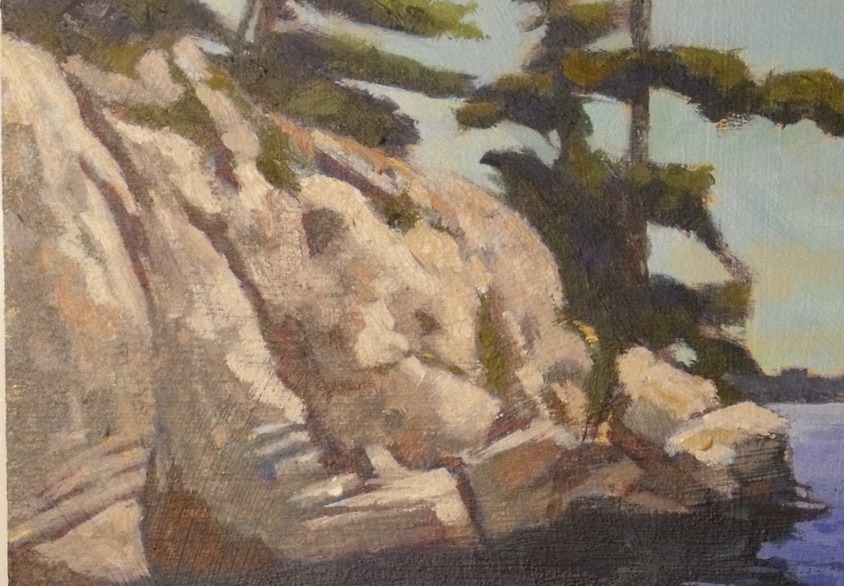
 This is acrylic in masonite, 12 x 16. I started with a dull gold wash, or imprimatura, over the entire board. A silhouette of the major shapes was washed in using a large synthetic bristle and a thin ,dull purple. Then, using a similar purple in a thicker mixture, I indicated my darkest shadows. All my drawing was done with brush and paint, a very direct approach. The sky area was roughly brushed in, using some of those colours to help refine the tree shapes. The trees were roughly blocked in with a variety of mixed greens. (I rarely use a tube green.)

The rocks were built up in several layers of various colours. Over the initial wash drawing a more comprehensive  lay-in was done with a variety of dull violet-grays in an attempt to flesh out the forms in the rock face.. Over this underpainting I built up layers of warmer colour, often dragging and scumbling to enhance the texture of the rock. The lightest areas are built up in a more impasto method.

The water was blocked in as a simple gradated shape with a little break-up in the foreground to indicate ripples and waves. The darks here are all the original dark washed in underpainting. The background far shore was initially laid in as part of the overall darkish silhouette, and I simply scumbled a thin pale blue over that area to push it back. Voila! Tomahawk Rocks.


Wednesday, January 4, 2012

Completed Commission

I was approached last summer to create a painting of the Georgian Bay area for a client's new office. The initial request was proposed as "reasonably large", which got me thinking around 18 x 24 or maybe 22 x 28. Then I saw the actual wall and came home and cut a 24 x 36 panel. For me, that's big. After a couple of false starts things started coming together. Finally, after all the Christmas merry-making was done, I made a couple of requested changes and it's done. Even though it has been a few months in the making, it counts as my first finished painting of 2012. "Royal Island Stairway", acrylic, is taken from an island near the Georgian Bay Islands National Park, one of Canada's national gems.

Tuesday, December 27, 2011

Honorable Mention

I was very pleased to receive notification today that I had garnered an Honorable Mention in a recent painting challenge. This is an online event at Artist Mentors Online, a project of Kevin Macpherson. This was very exciting personally because I hold Kevin in great esteem as a painter and teacher. I highly recommend his two books, Fill Your Oil Paintings With Light and Color, and Landscape Painting, Inside and Out.

The challenge for this painting was to use a single large brush for the entire painting. In my case, I used a Princeton #12 syntheyic flat (about 1" wide) on a 12 x 16 panel.

 This is a view from Picardy in northern France. My wife and I had the good fortune to spend two weeks in Europe this summer, and much of our drive was occupied with visiting First World War memorials. We had stopped at a memorial for Canadian soldiers who lost thier lives at the Battle of Courcelette, and this was the view across the fields towards the village. I have plans to do more paintings from that trip, from images of the Netherlands and Belgium, as well as France.

Tuesday, December 20, 2011

For My Students

At the end of my last class at Visual Arts Mississauga a couple of weeks ago, one of my students asked if there was some way I could post online to show her how I would go about finishing a demo that I had started; she wanted to see how I would solve some of the problems of water, in this case a sun splashed creek. So...

This is where we left off in class. I hadn't actually planned to do any more with this demo, and it was more than likely that the panel would simply have been gessoed over and used for another demo. (It could still happen...)

This was a bit hurried, as demos sometimes are. I probably rushed the glare on the water without doing more preparatory underpainting first, but I needed to move it along for the class. The foreground bank on the right hasn't been touched since the initial lay-in of colour, and I think the strip of glare in the background needs to be more contained in a curve of the bank, and the far b/g us totally understated.

Now the right-hand bank is more finished; it is still very much a suggestion, not a highly detailed depiction of rock and mud and undergrowth, but part of the focus in this class was on a more spontaneous look, not a laboured copy of the reference. The foreground surface of the water has more sky reflection on it now, streaked in places to indicate the movement of the water. Similarly, the midground water has been modified to show a bit more ripple and sparkle. There is some sun-dapple on the tree trunks, a bit of dapple on the left-hand bank, and some pale trunks have been suggested in the background foliage. The right-hand bank has brought around in a little bit of a curve to left to crop the strip of glare on the b/g water, but it has mostly been cropped in the photo (sorry!)

To create the illusion of transparency, I think the foreground water needs to be treated in layers. the lowest layer is dull greys and grey-greens. There is a suggestion of stone and rock in the creek bed, but there is not a lot of contrast, the edges are rather soft. Subsequent layers add more colour and indicate motion in the water, and the sky reflections are placed at the end.

I hope that helps. If there questions, ask them in the comments section and I'll do my best to answer them.

See you in the studio!